

Substantial Introducer Sheath Selection and Placement Best Practices
2026-09-27
When every millimeter matters in large-bore access, choosing the right introducer sheath isn't just a step—it's the step that sets the stage for success. Yet placement pitfalls still catch even experienced operators off guard. In this post, we break down selection criteria and placement techniques that actually hold up in the suite, with practical takeaways from INT devices designed for the job.
Sizing the Sheath to the Target Vessel Without Overcomplicating It
A sheath that tracks smoothly without scraping the vessel wall is almost always the right choice, but getting there doesn't require a calculator. Start with the smallest size that will accommodate the planned catheter or device and confirm the vessel diameter on ultrasound. If the vessel looks generous and the procedure calls for multiple exchanges, one French size up may reduce friction without adding meaningful trauma. The goal is a snug fit at the puncture site, not a tight fit along the entire course.
Many operators overthink this step by comparing manufacturer charts or chasing an exact ratio. In practice, a 5 Fr sheath in a 6 mm vein is rarely a problem, and a 7 Fr sheath in the same vessel can also be fine if the vein is straight and superficial. What matters more is the angle of entry and the length of the sheath. A longer sheath that crosses a bend will kink or irritate the intima, regardless of diameter. Match the sheath length to the straight segment you actually need to traverse, not the total distance on the screen.
When in doubt, downsize one step and watch how the sheath moves with respiration. If there is visible tenting at the puncture site or resistance during advancement, stop and reassess instead of forcing a larger size. A slightly smaller sheath that allows a little back-bleeding is easier to manage than a larger one that splits the vessel or dissects the wall. Simple checks beat complicated formulas.
Prepping the Access Site for a Substantial Introducer
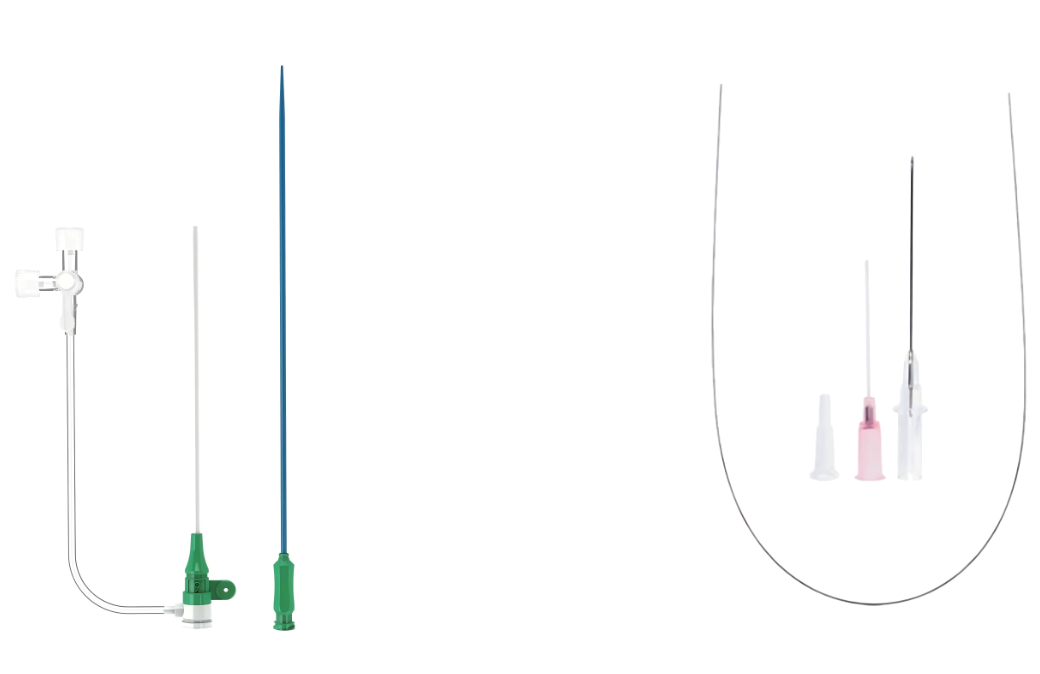
Before placing a large-bore introducer, build a clean and stable field. Palpate the target vessel and confirm its course; for femoral access, stay below the inguinal ligament and away from the femoral head. Apply chlorhexidine or povidone-iodine with a generous area, then wait for it to dry completely. Drape wide enough to handle the longer introducer and any needed repositioning without breaking the sterile boundary.
Local anesthetic should go beyond the puncture point and into the anticipated tract, since a substantial introducer dilates and passes through deeper tissue. Make a small skin nick with a #11 blade running along the vessel axis to prevent skin tenting and sheath kinking. If using ultrasound, keep the probe sterile and angle the needle so the wire exchanges smoothly without catching on the anterior wall.
After the wire is seated, pre-dilate with smaller dilators before advancing the substantial introducer. Confirm the wire slides freely and never force the sheath. When resistance appears, reassess the angle, re-dilate, or use fluoroscopic guidance. This stepwise approach reduces vessel trauma and keeps the access from collapsing during the exchange.
Step-by-Step Advancement That Avoids Vessel Trauma
Inserting any device into a vessel demands patience over force. Start by letting the tip find its own path; if you feel resistance, pull back a millimeter or two, rotate slightly, and then advance again with barely any forward pressure. This micro-retraction creates a pocket of space that lets the wire or catheter glance off the wall instead of digging in.
Watch the fluoroscopy image more than your hands. A slow, deliberate push paired with small clockwise-counterclockwise movements keeps the leading edge centered in the lumen. When the angle changes or the vessel curves, shorten your stroke length and pause after each nudge to confirm the tip still moves freely. That pause is what prevents dissection.
Finally, never rush past a point where the device stops translating smoothly. A blunt tip or a stiff shaft can scrape the intima even without obvious force. Swap to a softer wire, adjust the sheath angle, or use contrast to map the bend before continuing. Trauma is rarely caused by one big mistake—it accumulates from dozens of tiny, unchecked advances.
Using Real-Time Imaging to Confirm Position Before It's Too Late
Real-time imaging shifts the decision point from after the fact to before the action becomes irreversible. In a vascular procedure, for instance, a surgeon advancing a catheter can see the tip's trajectory on a live fluoroscopy feed. If the angle starts to drift, the correction happens in the same breath, not after a delayed contrast study reveals the vessel wall has already been breached.
The same principle applies to assembly lines where robotic arms place precision components. A camera mounted above the work area streams alignment data to the control loop, allowing a last-millisecond nudge before the press applies full force. Without that live visual confirmation, the only feedback would be a scrapped part or a jammed tool.
What makes this approach stand out is the timing of the information. Static images or periodic checks tell you what went wrong after the damage is done. Real-time imaging keeps the window open just long enough to act, turning a post-mortem inspection into an active safeguard.
Managing Resistance and Kinking During Large-Bore Placement
Large-bore catheters and sheaths are unforgiving when it comes to resistance—what feels like a minor hang-up can quickly become a kink or a vessel tear if you push through it. The first rule is to recognize the difference between normal tactile feedback from the vessel wall and true obstruction. If the guidewire moves freely but the dilator or catheter stalls, stop and reassess rather than applying more force. A subtle redirect of the angle, a gentle twist of the hub, or withdrawing a centimeter to re-advance under fluoroscopy often resolves the issue without damaging the access site.
Kinking typically starts at a transition point: where the stiff shaft meets the softer tip, or where the device crosses a tortuous iliac segment. To prevent this, maintain continuous wire position well beyond the target zone and use a buddy wire or stiffer exchange-length wire when the anatomy demands it. When advancing a large-bore sheath, keep your hands close to the skin and use short, controlled pushes—never long, sweeping motions. If you feel the shaft bowing or see an acute angle on imaging, pull back slightly, straighten the wire, and consider upsizing the access or switching to a sheath with a reinforced proximal segment.
Another practical tip is to pre-dilate the subcutaneous tract and vessel entry with serial dilators, especially in scarred or calcified groins. Lubricating the outer surface of the dilator or sheath with saline can reduce friction without introducing air. Never force a kinked device through the skin; if a kink forms, remove the entire assembly and inspect it on the back table. A bent wire or damaged sheath tip is a sign that the tract needs more preparation, not more pressure. Taking an extra minute to adjust trajectory or exchange a wire will save you from a failed access or a vascular complication later.
Immediate Post-Placement Checks That Prevent Delayed Complications
Right after placement, a quick visual and tactile sweep catches most of what later turns into a late-night emergency. Confirm the device or dressing is actually where it belongs, with no kinks or tension lines, and that the surrounding skin shows no blanching, swelling, or fluid tracking. These aren't cosmetic details; a subtle fold or a few millimetres of migration can shift pressure onto structures that won't complain until inflammation has already set in.
Functional checks matter just as much as appearance. Flush, aspirate, or cycle the system once, gently, not just to confirm patency, but to feel for resistance that suggests early clot, tissue entrapment, or tip malposition. Document the baseline, including any patient-reported sensation that deviates from expected. If the patient feels sharp pain on a supposedly routine flush, that's a signal worth pausing for, not pushing through.
Tie the immediate findings to a short follow-up window rather than assuming stability. A normal check now doesn't rule out delayed swelling or slow leakage, so give the patient or caretaker specific signs to watch for over the next few hours. That handoff from bedside verification to early warning is what actually prevents delayed complications from becoming serious ones.
FAQ
Inner diameter determines device compatibility, while outer diameter drives arterial wall stretch and injury. Many operators fixate on the French size, but two 18 French sheaths from different manufacturers can have noticeably different outer profiles. In calcified or small vessels, checking the product insert for actual outer diameter can mean the difference between a controlled track and a dissection.
If ultrasound reveals circumferential anterior and posterior wall calcification, a vessel diameter under 5 mm, or a femoral bifurcation that sits above the inguinal ligament, the common femoral route is no longer safe. Switch to an iliac, axillary, or transcaval approach before making any puncture. Forcing a large sheath through a hostile femoral segment creates a high risk of rupture or distal embolization.
One suture-based closure device is rarely enough. Use two devices deployed at orthogonal angles before sheath insertion, or combine one suture device with a collagen plug system. Plan the closure strategy before placing the sheath because once a 20 French or larger introducer sits in the artery, the window for clean suture capture closes.
Serial dilation in 2 French increments works better than a single jump to final size. Give the tissue 20 to 30 seconds between dilators to relax rather than tearing. Rotating a hydrophilic dilator gently during passage also lowers shear force compared to straight pushing, especially through scarred or previously accessed groins.
Inject a small volume of diluted contrast through the side arm under fluoroscopy. You should see the sheath tip floating freely above the aortic bifurcation with no sharp angle at the iliac entry. If the tip is pressed against a vessel wall, rotate the sheath slightly or pull back 1 to 2 cm while keeping wire support.
A large sheath provides far more thrombogenic surface area, but early full heparinization can turn a small access site ooze into a large hematoma. Start with a heparinized saline flush through the side arm immediately after placement, then follow with low-dose ACT-guided heparin on the table. Save full anticoagulation for after the procedure if closure looks secure.
Loss of a palpable foot pulse is obvious, but calf muscle ache, skin mottling, and a falling toe oxygen saturation often appear before the pulse disappears. Check the anterior tibial and posterior tibial Doppler signals intermittently, not just pedal pulses by hand. Any new asymmetry should prompt immediate angiography through the sheath.
Conclusion
Sizing a substantial introducer sheath to the target vessel does not need to be an exercise in overthinking, but it does demand respect for the anatomy in front of you. A sheath that is even slightly too large can wedge against the vessel wall, while one that is too small commits you to an extra exchange and another pass through the access site. Once the size is settled, make the skin nick generous and get the drape and lighting set before you handle the device; a cramped or poorly exposed field is where kinks and false tracks begin. Advance in short, controlled moves, letting the tip find its path rather than shoving it around curves. If the dilator or sheath hesitates, stop and reassess instead of building force.
Use real-time imaging from the very first wire pass—not as a last-minute confirmation but as a running guide to where the tip is heading. When you hit resistance or see the sheath starting to bow, back off slightly, rotate, and try a shallower angle; forcing a kinked large-bore sheath only transfers that stress to the vessel. After the sheath is seated, spend an extra minute on immediate checks. Flush every port, aspirate for blood return, verify tip position under imaging, and look for any swelling or thrill at the entry site. These simple post-placement steps are the difference between catching a slow retroperitoneal leak early and finding out hours later.
Contact Us
Contact Person: Jeffrey
Email: [email protected]
Tel/WhatsApp: 86-0633-2230056
Website: https://www.sd-intmedical.com